Looking to enjoy fresh air without letting mosquitoes invade your home?
Installing a mosquito net door is an effective and practical solution. Follow this simple, step-by-step guide to set up your net door with ease.
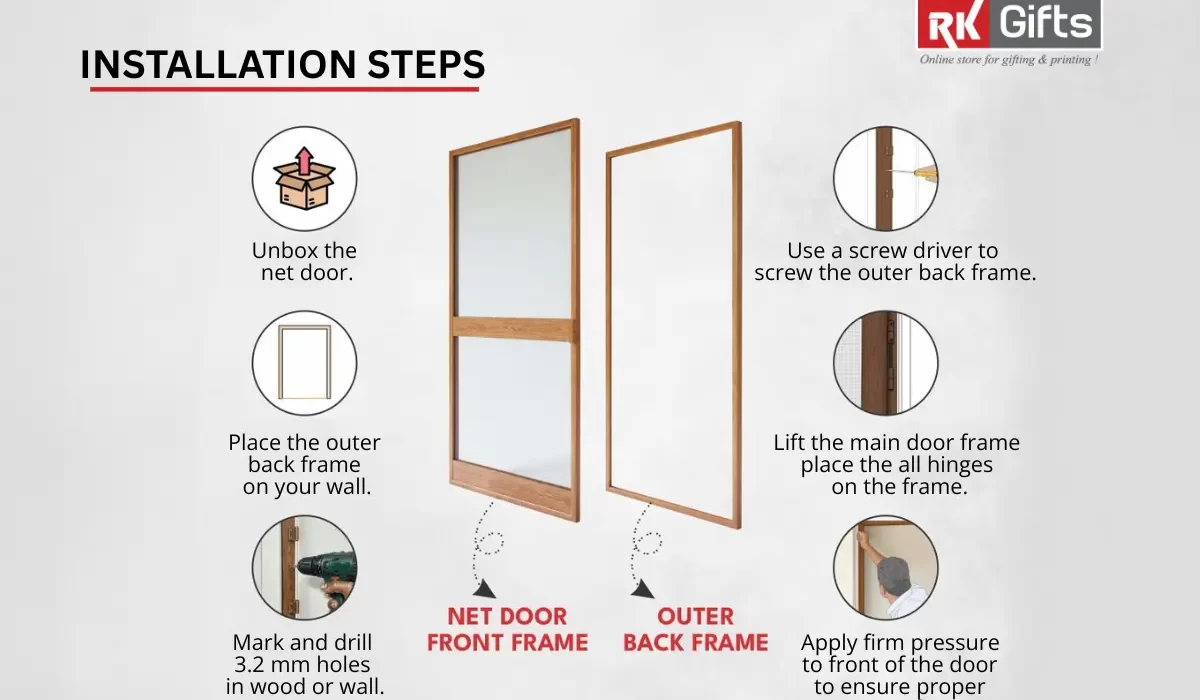
Step-by-Step Installation Process
1. Unbox the Net Door
Remove the product from the packaging. Check that all components are present: outer back frame, main door frame, hinges, screws or fixings. Making sure you have everything before you begin means fewer interruptions.
2. Place the Outer Back Frame on the Wall
Hold the outer back frame against the wall or doorway where you intend to mount it. Ensure it sits level and centered. A well-positioned frame sets the foundation for smooth door operation.
3. Mark and Drill Holes
Mark the locations for the screw holes in the wall or timber. Usually it’s recommended to use around 3.2 mm drill bits for the screws in wood or wall. This ensures strong anchoring and prevents wobble.
4. Use a Screwdriver to Fix the Back Frame
Secure the outer back frame into place by driving in the screws via your drill or screwdriver. Ensure that the frame is firmly mounted and doesn’t wobble. A solid frame means the door will hang straight and function properly.
5. Lift the Main Door Frame and Hinge It
Align the main door frame with the mounted back frame. Place the hinges into position and hang the door frame onto the fixed frame. Check that it swings freely, opens/closes smoothly, and sits flush when closed.
6. Apply Firm Pressure to the Door to Ensure Proper Fit & Magnet Fixing
Once hung, close the door and apply firm pressure along the front of the door, particularly if there’s a magnetic fixing or seal strip. This ensures that the magnet lines up and secures properly, creating a good tight-seal so that insects cannot get through.